The Origin
The whole idea comes from a video game called Watch dogs 2 that i had recently picked up for a bargain at the Humble bundle store.
In the game you play as a “Hacktivist” called Marcus who has a knack for hacking and electronics and one of the first gadgets the player gets to use is a remotely controlled car that can be used to scout out areas etc. Its called the RC jumper since it has the absurd ability to also jump quite the height.
The game uses a third person perspective to control the car. A third person perspective might be hard to replicate in the real world but not necessarily impossible.
Some modern production cars are equipped with multiple cameras around the car and by using a stitching algorithm it is able to create a convincing third person perspective with minimal visual artifacts.
Here is a video that shows Audis solution for the 3D camera stitching: Youtube Video
The Hardware
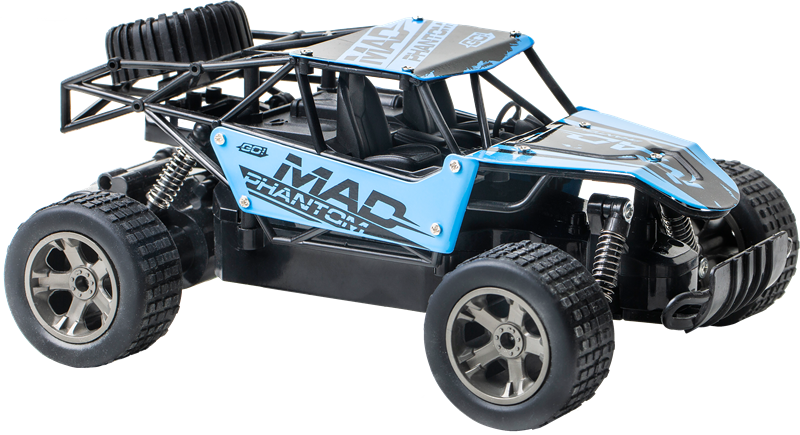
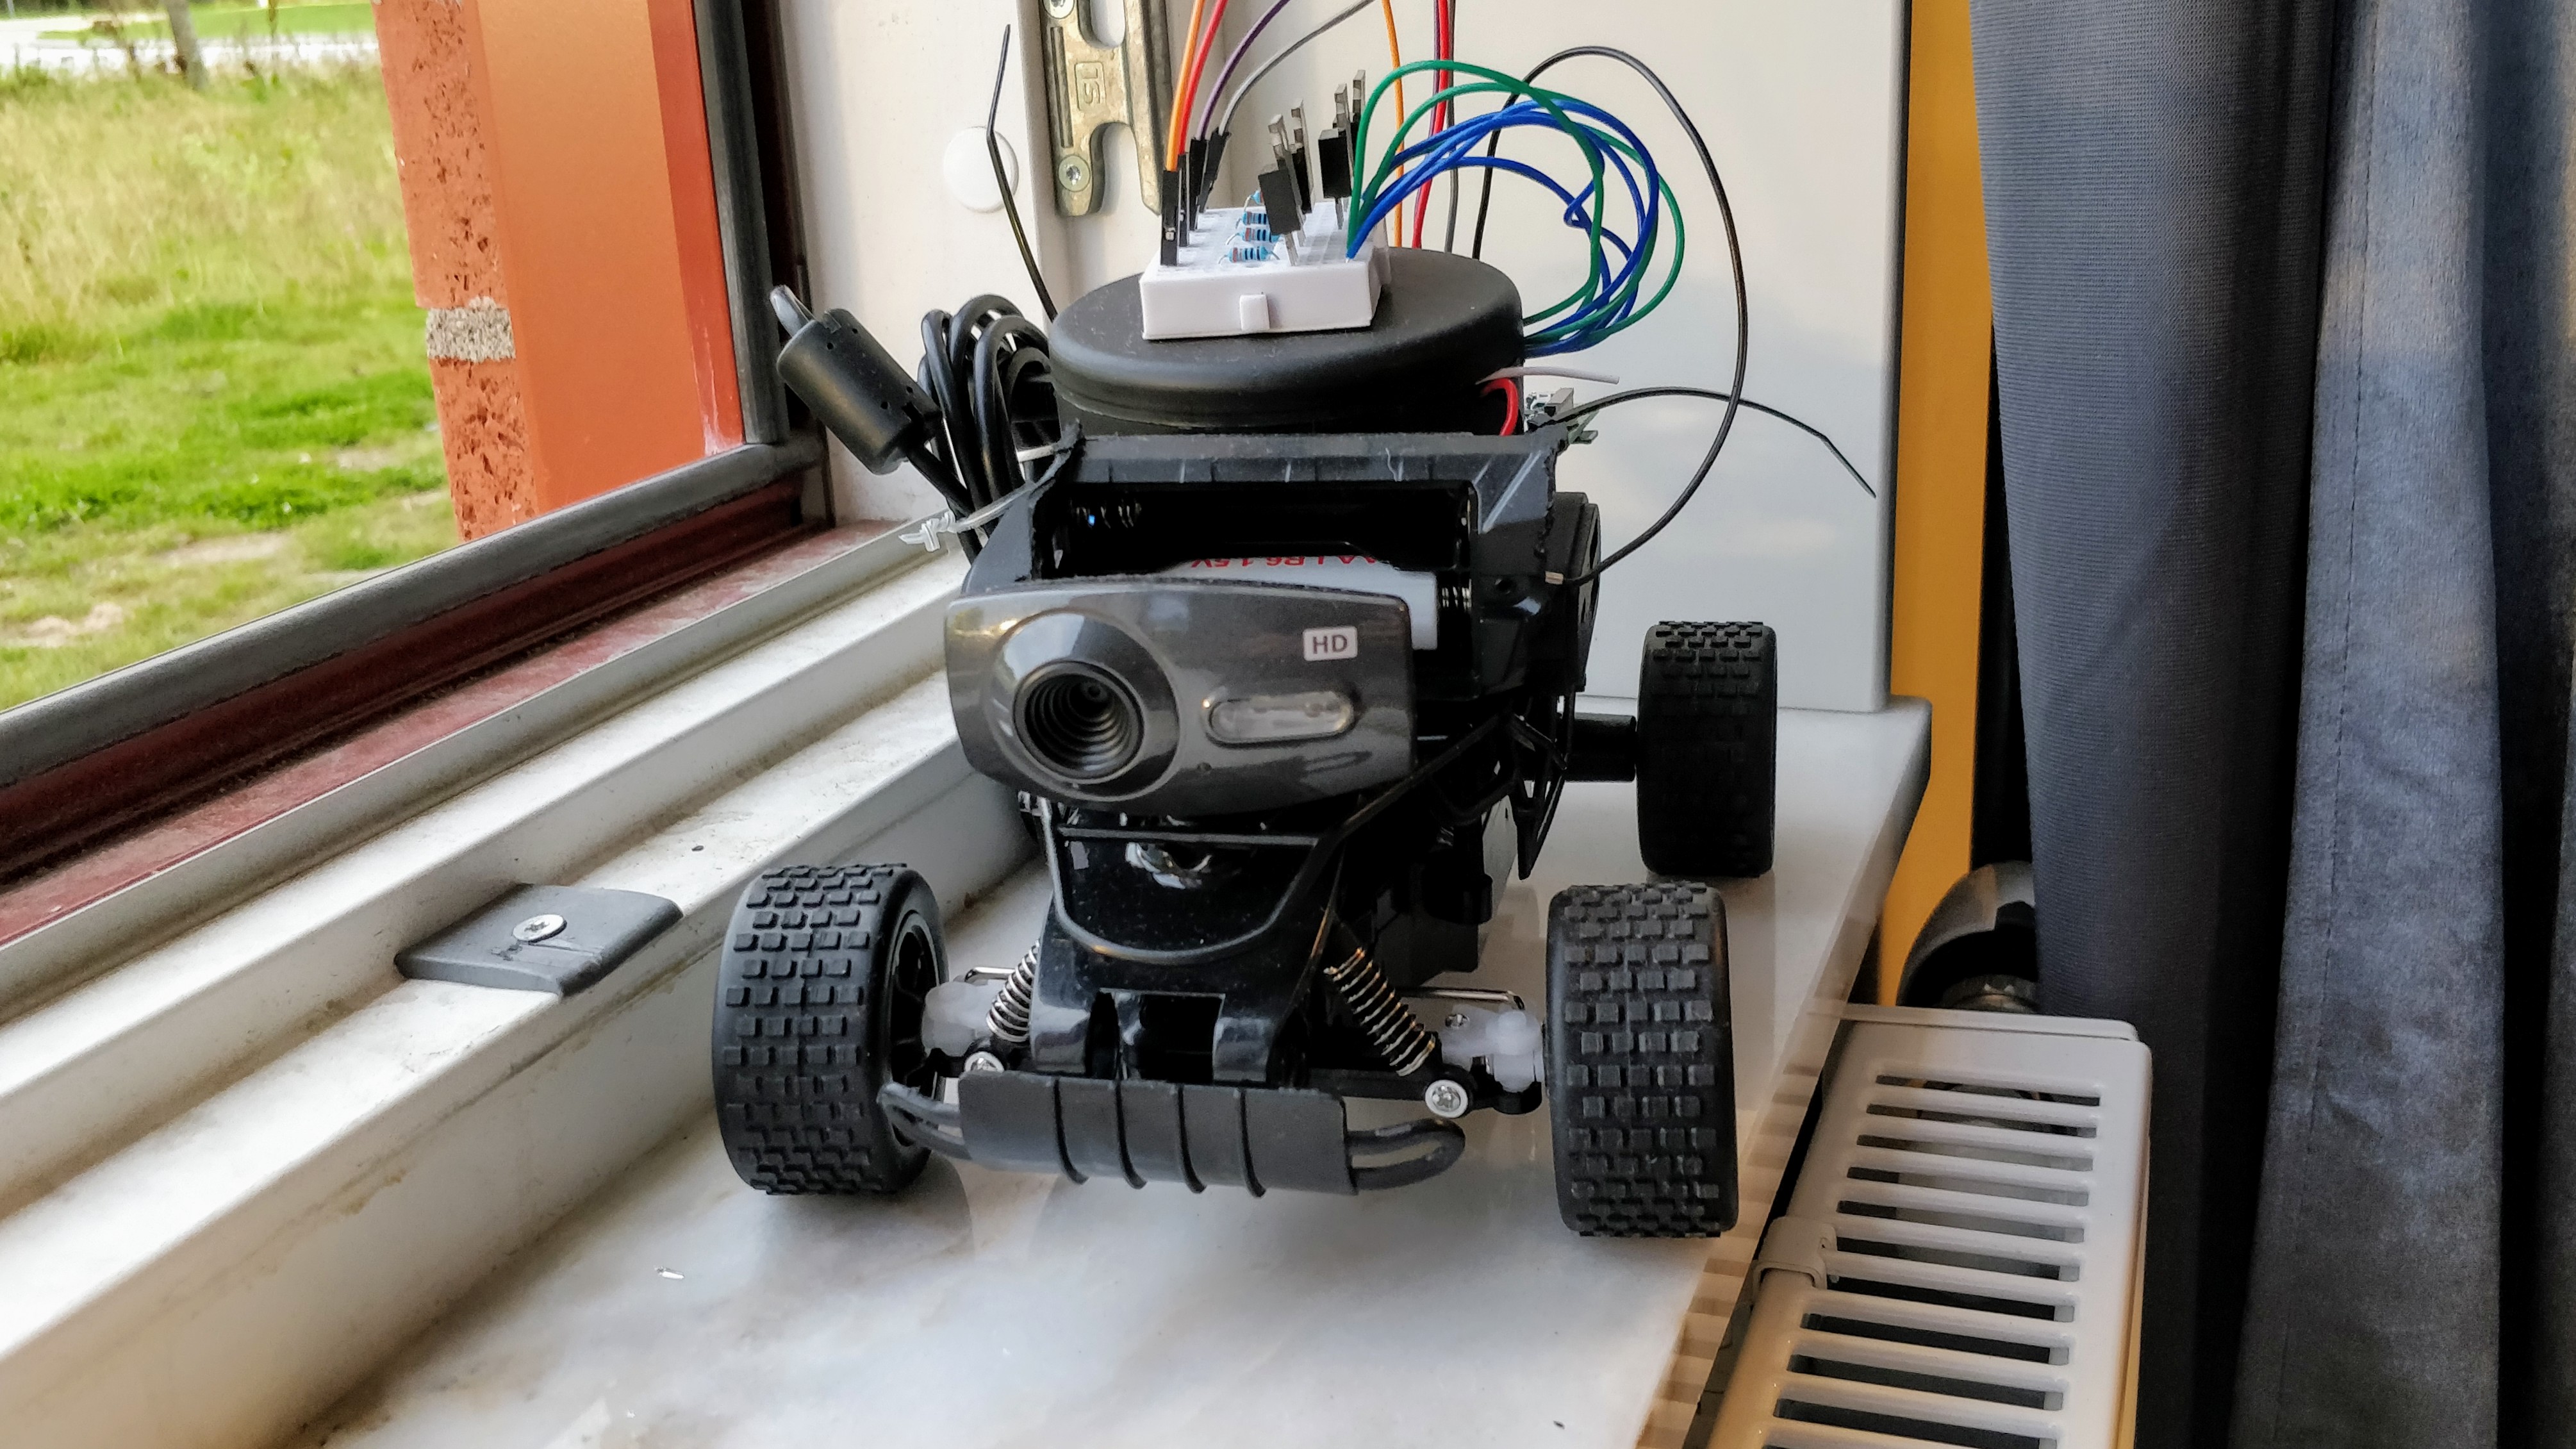
I started looking into what cheap RC-cars was available in my area and i found this one. Its a cheap Chinese car that was being sold by Teknikmagasinet; a local electronics store. I found the fear-inducing, mind bending 1:18 METAL WARTRACK which sounds WAY too cool for a lame car such as this one. The car boasted having a breakneck speed of 18 km/h and that it “screamed of driving pleasure”. Well… i just need it to work, that´s all.
In order to interface with the car i decided to intercept the inputs from the wireless controller. I had to bypass the analog way the controller took inputs and replace them with digital components that can be controlled with code.
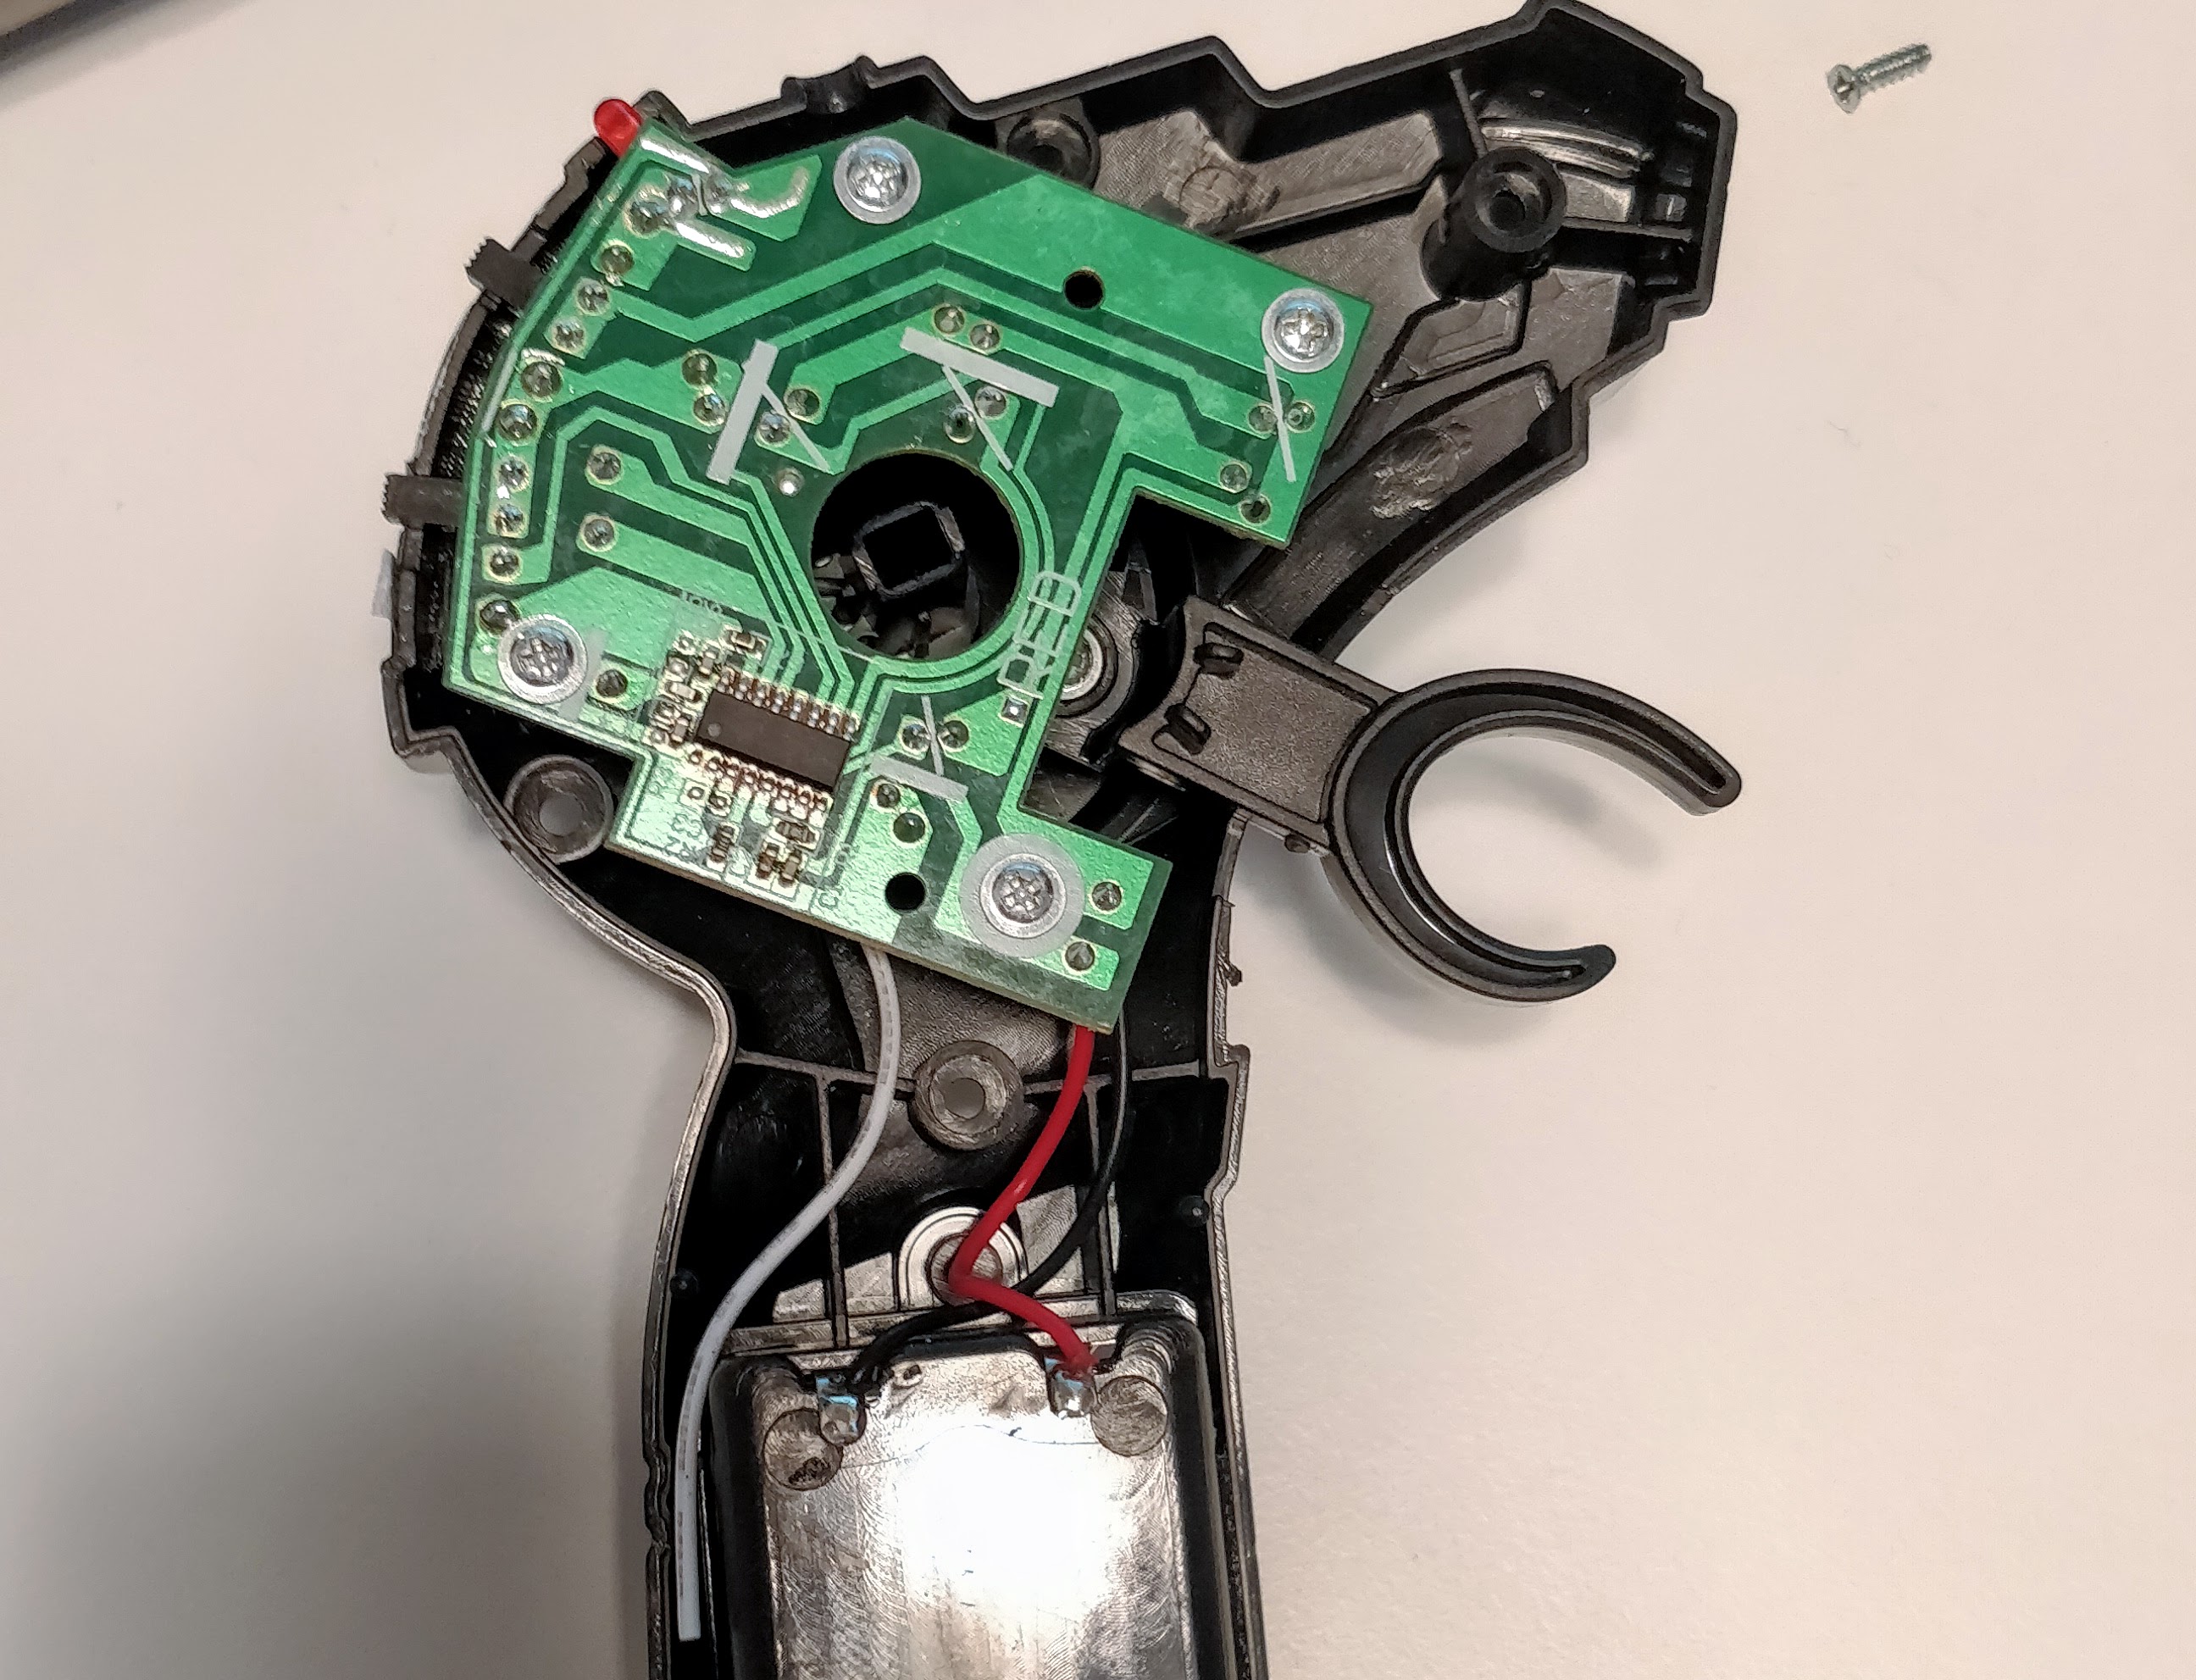
Upon opening the controller i found that it compromised of four analog buttons, a twin AA battery source and some kind of wireless communication chip. The four simple analog buttons where used to gather control input which was sent by the wireless communication chip. The cheap and simple design of the controller did not seem to offer granular control of either the throttle or steering. The possible states where full speed ahead or reverse and steer all the way to the right or left. I also noted that the mechanical design made it impossible to close both throttle and reverse buttons at the same time. To avoid damage i would have to keep that in mind.
Soldering two wires to both pins of the button and hooking up a MOSFET transistor and i was able to activate the button with the GPIO pins of a Raspberry pi. I also added a current limiting resistor to the GATE pin. A common ground between the rc-controller and the raspberry pi is also needed and was added.
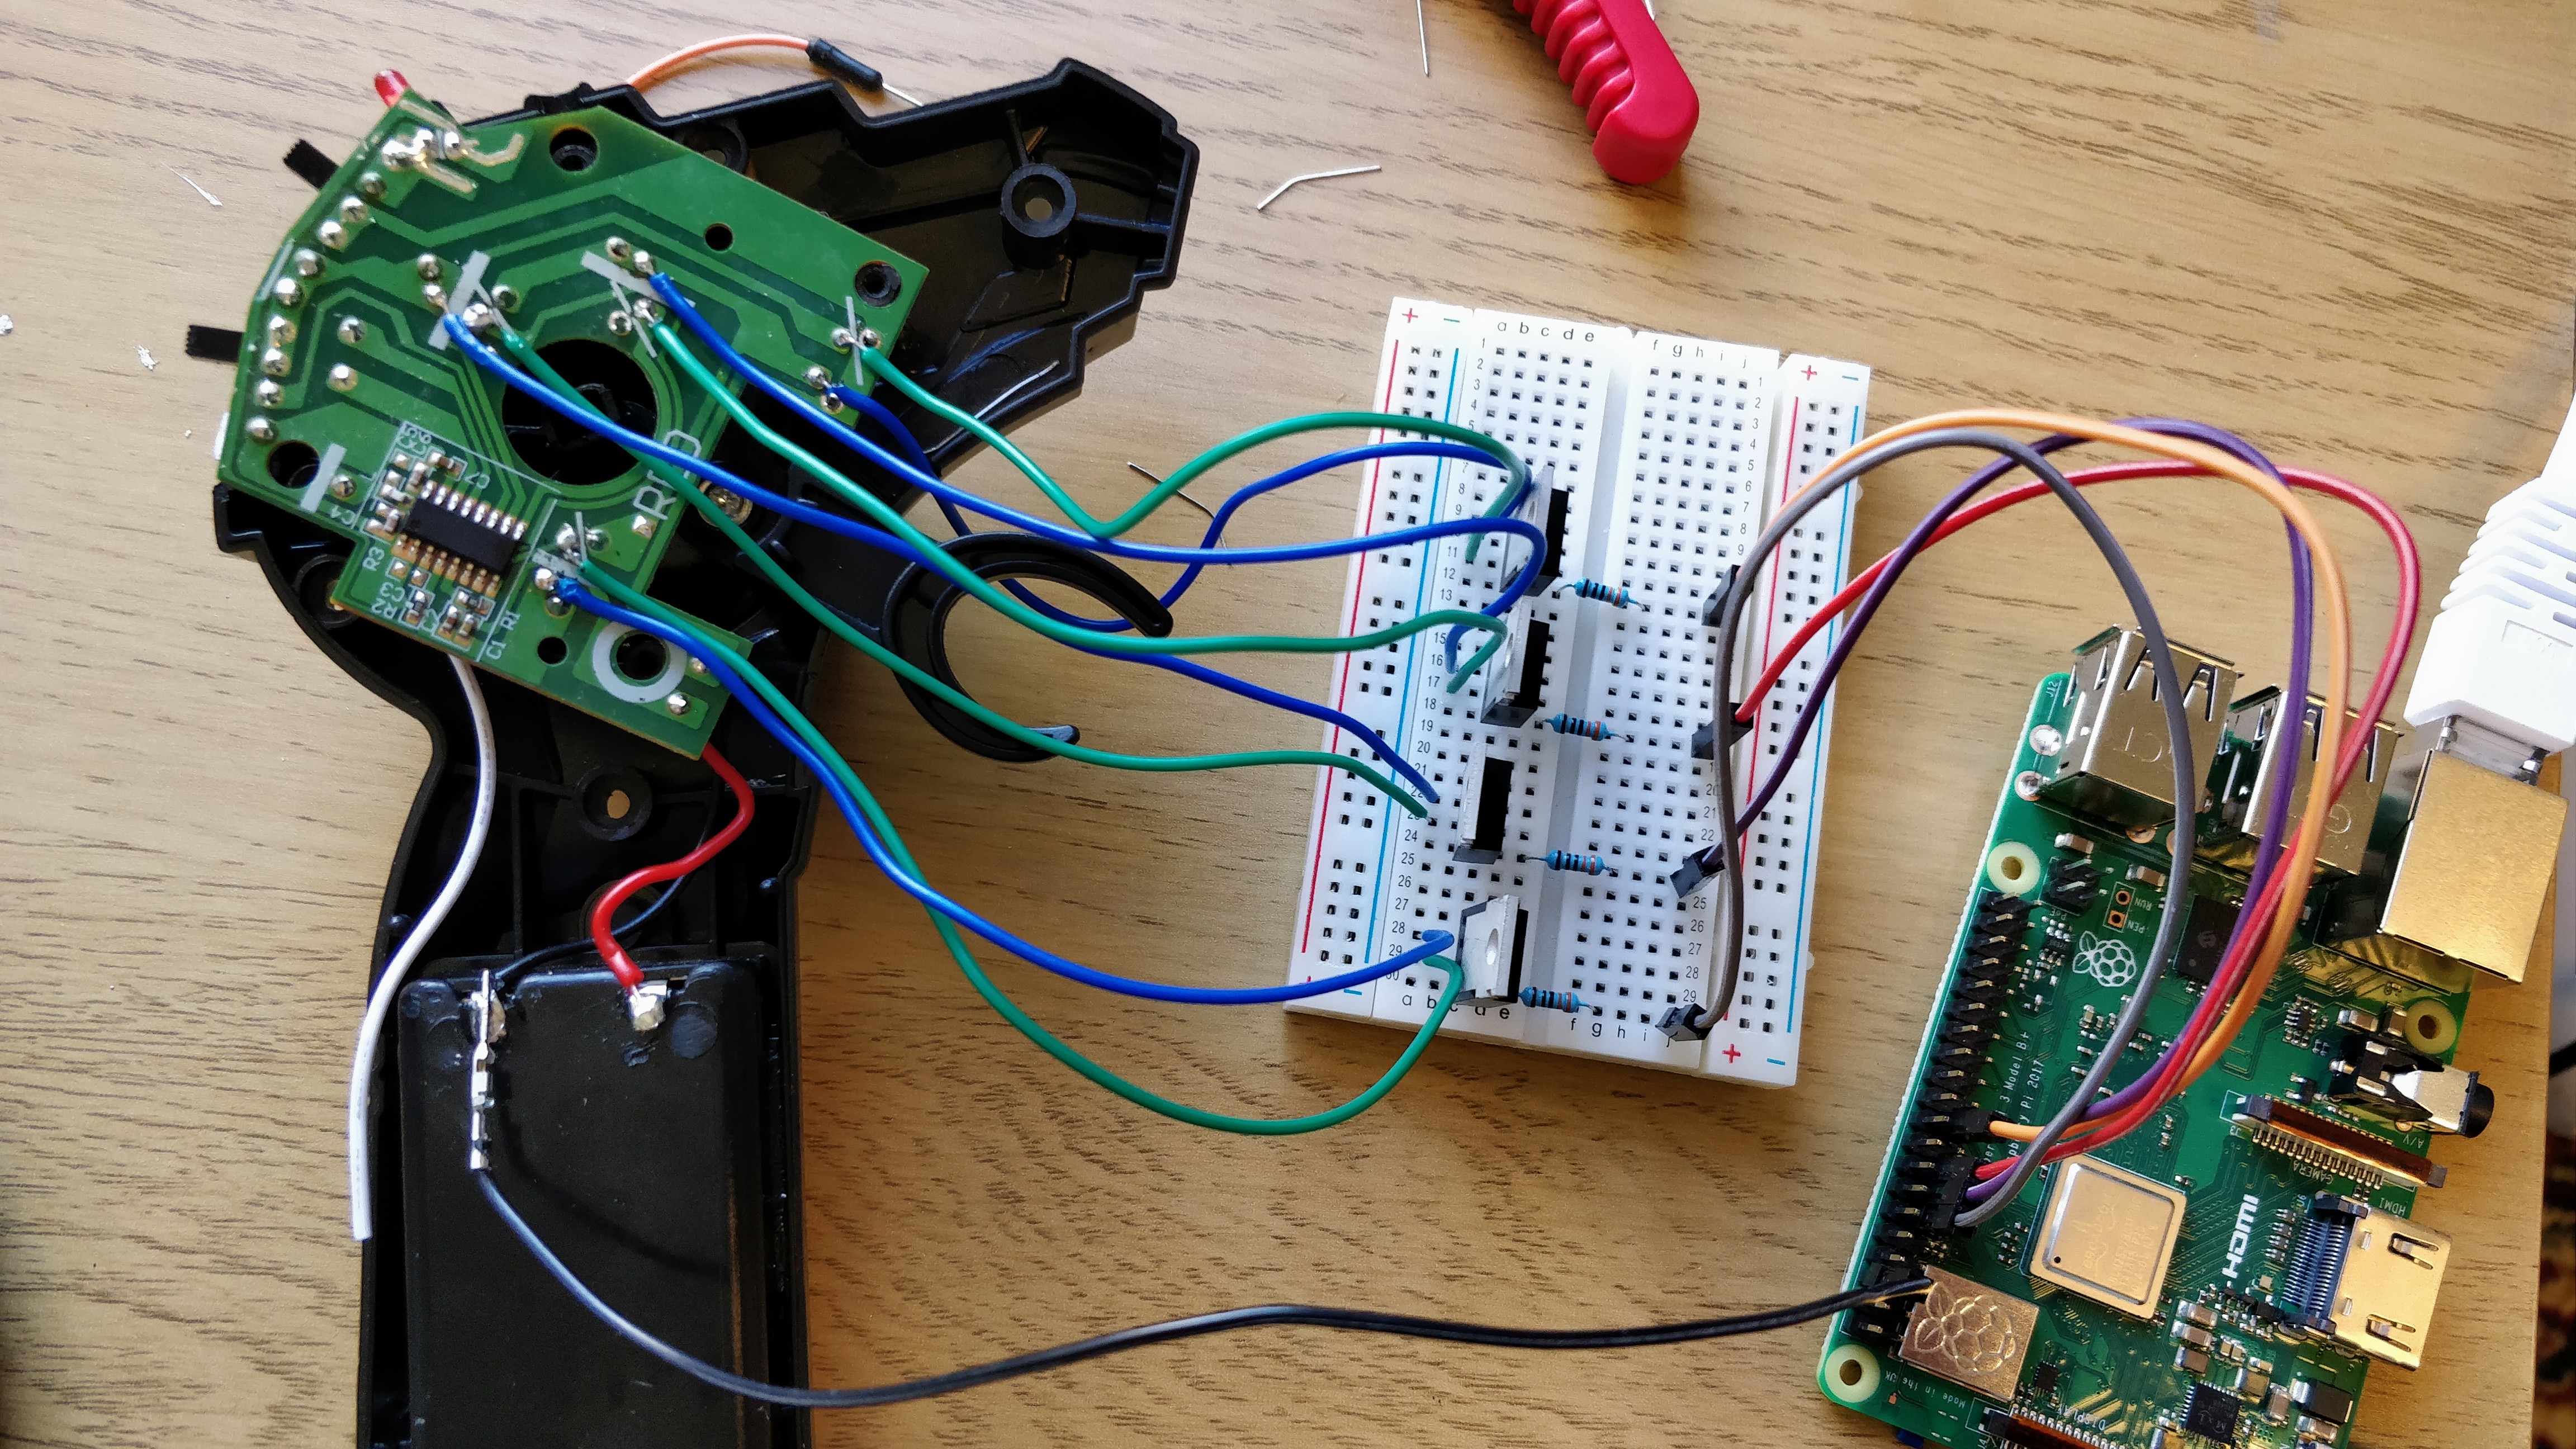
After soldering like a mad man i had finally connected all the buttons with their respective MOSFET transistor and had those hooked up to the raspberry pi. With all the wiring in place it was time for the part i was waiting for, THE CODING.
The Code
The reason I wanted the car to use HTML for controlling it is that i would like the ability to some day control the car over the internet. I decided to setup a web server on the raspberry pi. I ended up using a python based web server called FLASK.
The web server is run on a local hotspot that the raspberry pi itself creates and that enables users that are connected to the hotspot ability to issue commands to the car.
The code is very simple and works by taking in HTML requests for directories such as “/control_accel_on” which sets the proper GPIO pin to start the accelerator on the car. The issuer of that command then has the responsibility to also send a request for the “/control_accel_off” directory to make sure the car does not goes off and put a hole in my wall.
The issuer of the commands is also responsible to not engage the accelerator and the reverse action at the same time to avoid damage to the motors.
To issue the web page request i decided to run a second python script that uses a configured bluetooth connected controller to read input. The processing of the inputs took some time but i managed to read the values of both triggers for accelerating and reversing and the directional buttons for steering.
The triggers on the controller returned a value between 0 and 255 so a had to interpret anything above 127 as the button being activated. The directional pad on the other hand shared button id but returned different values depending on what direction was pressed.
A great tutorial on how to read bluetooth commands for your own project can be found here.
Any read command simply issued a HTML open request using pythons urllib.request library.
Python Flask web server
import RPi.GPIO as GPIO
from flask import Flask, render_template, redirect, url_for, request, flash, g
#GPIO and pin setup
left = 17; right = 27; backward = 22; forward = 10
GPIO.setmode(GPIO.BCM); GPIO.setup(17, GPIO.OUT); GPIO.setup(27, GPIO.OUT); GPIO.setup(22, GPIO.OUT); GPIO.setup(10, GPIO.OUT)

app = Flask(__name__)
@app.route("/control_accel_on")
def control_accel_on():
    GPIO.output(forward, GPIO.HIGH)
    return "1"
@app.route("/control_accel_off")
def control_accel_off():
    GPIO.output(forward, GPIO.LOW)
    return "1"
@app.route("/control_rever_on")
def control_rever_on():
    GPIO.output(backward, GPIO.HIGH)
    return "1"
@app.route("/control_rever_off")
def control_rever_off():
    GPIO.output(backward, GPIO.LOW)
    return "1"
@app.route("/control_steer_left")
def control_steer_left():
    GPIO.output(left, GPIO.HIGH)
    return "1"
@app.route("/control_steer_right")
def control_steer_right():
    GPIO.output(right, GPIO.HIGH)
    return "1"
@app.route("/control_steer_idle")
def control_steer_idle():
    GPIO.output(left, GPIO.LOW)
    GPIO.output(right, GPIO.LOW)
    return "1"
The camera feed
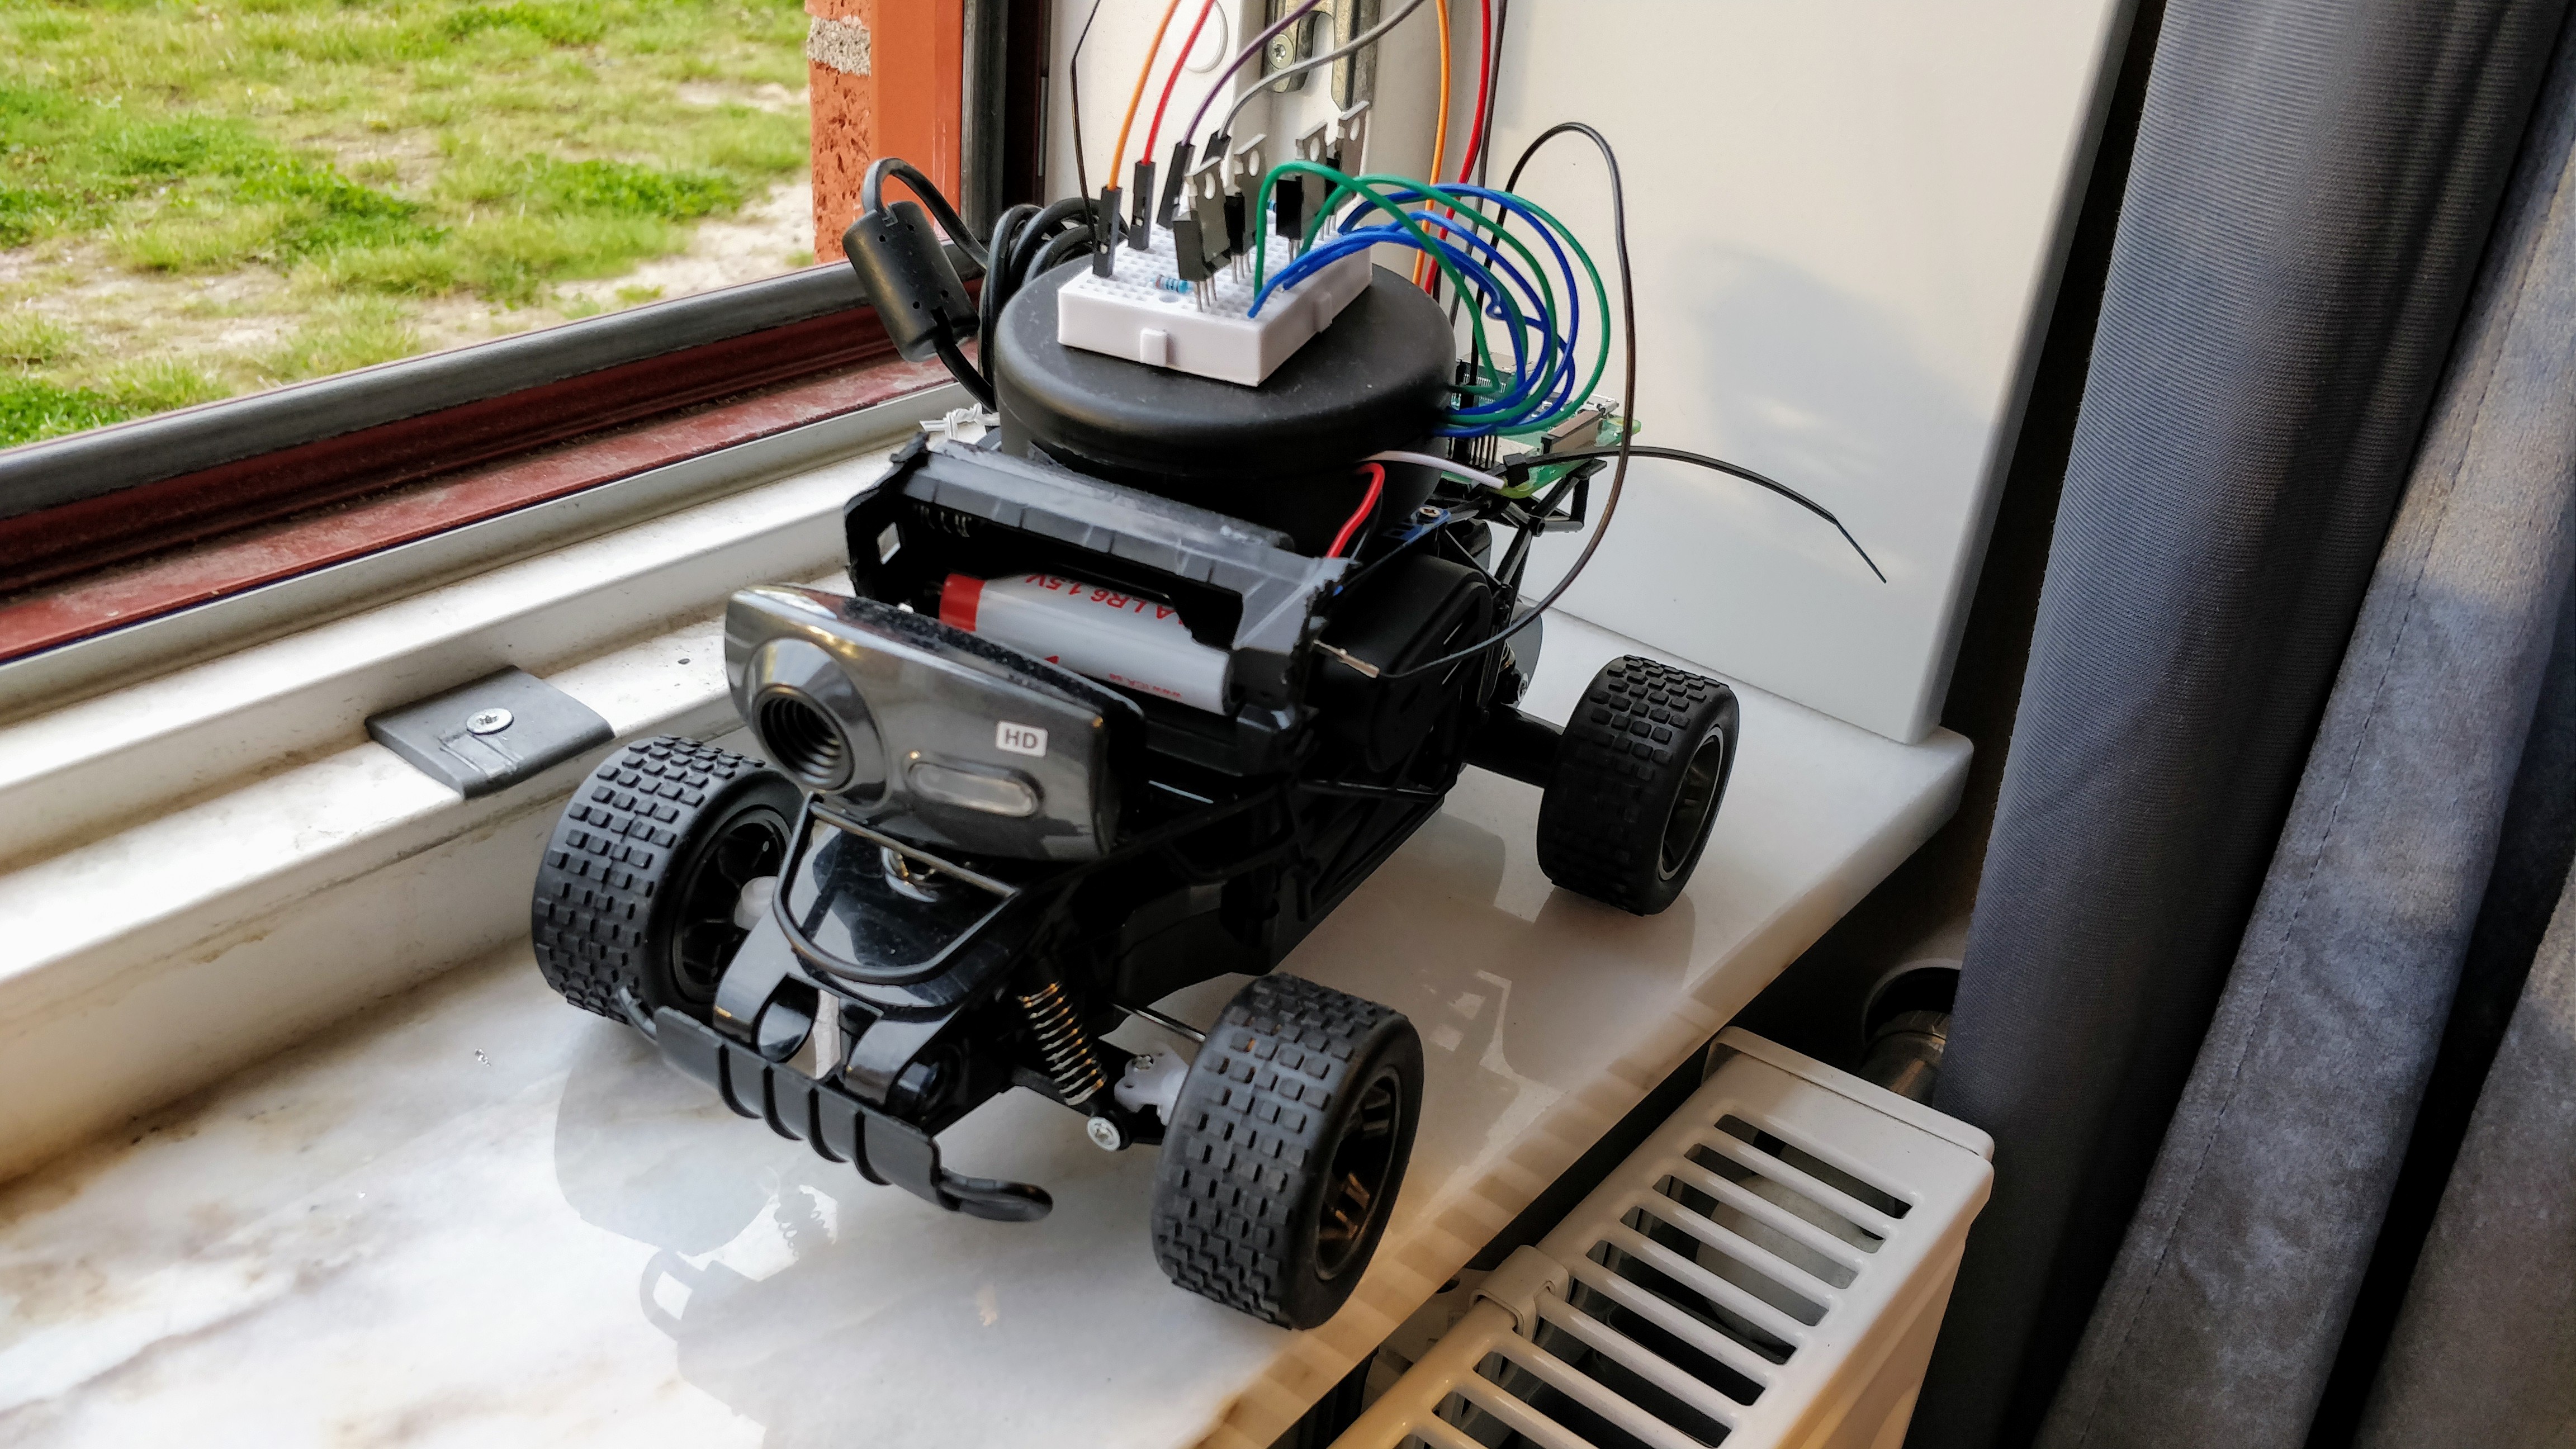
I wont be getting multiple cameras and getting a 3D stitching algorithm to work but i did have a cheap webcam lying around so i decided to add that one to the car.
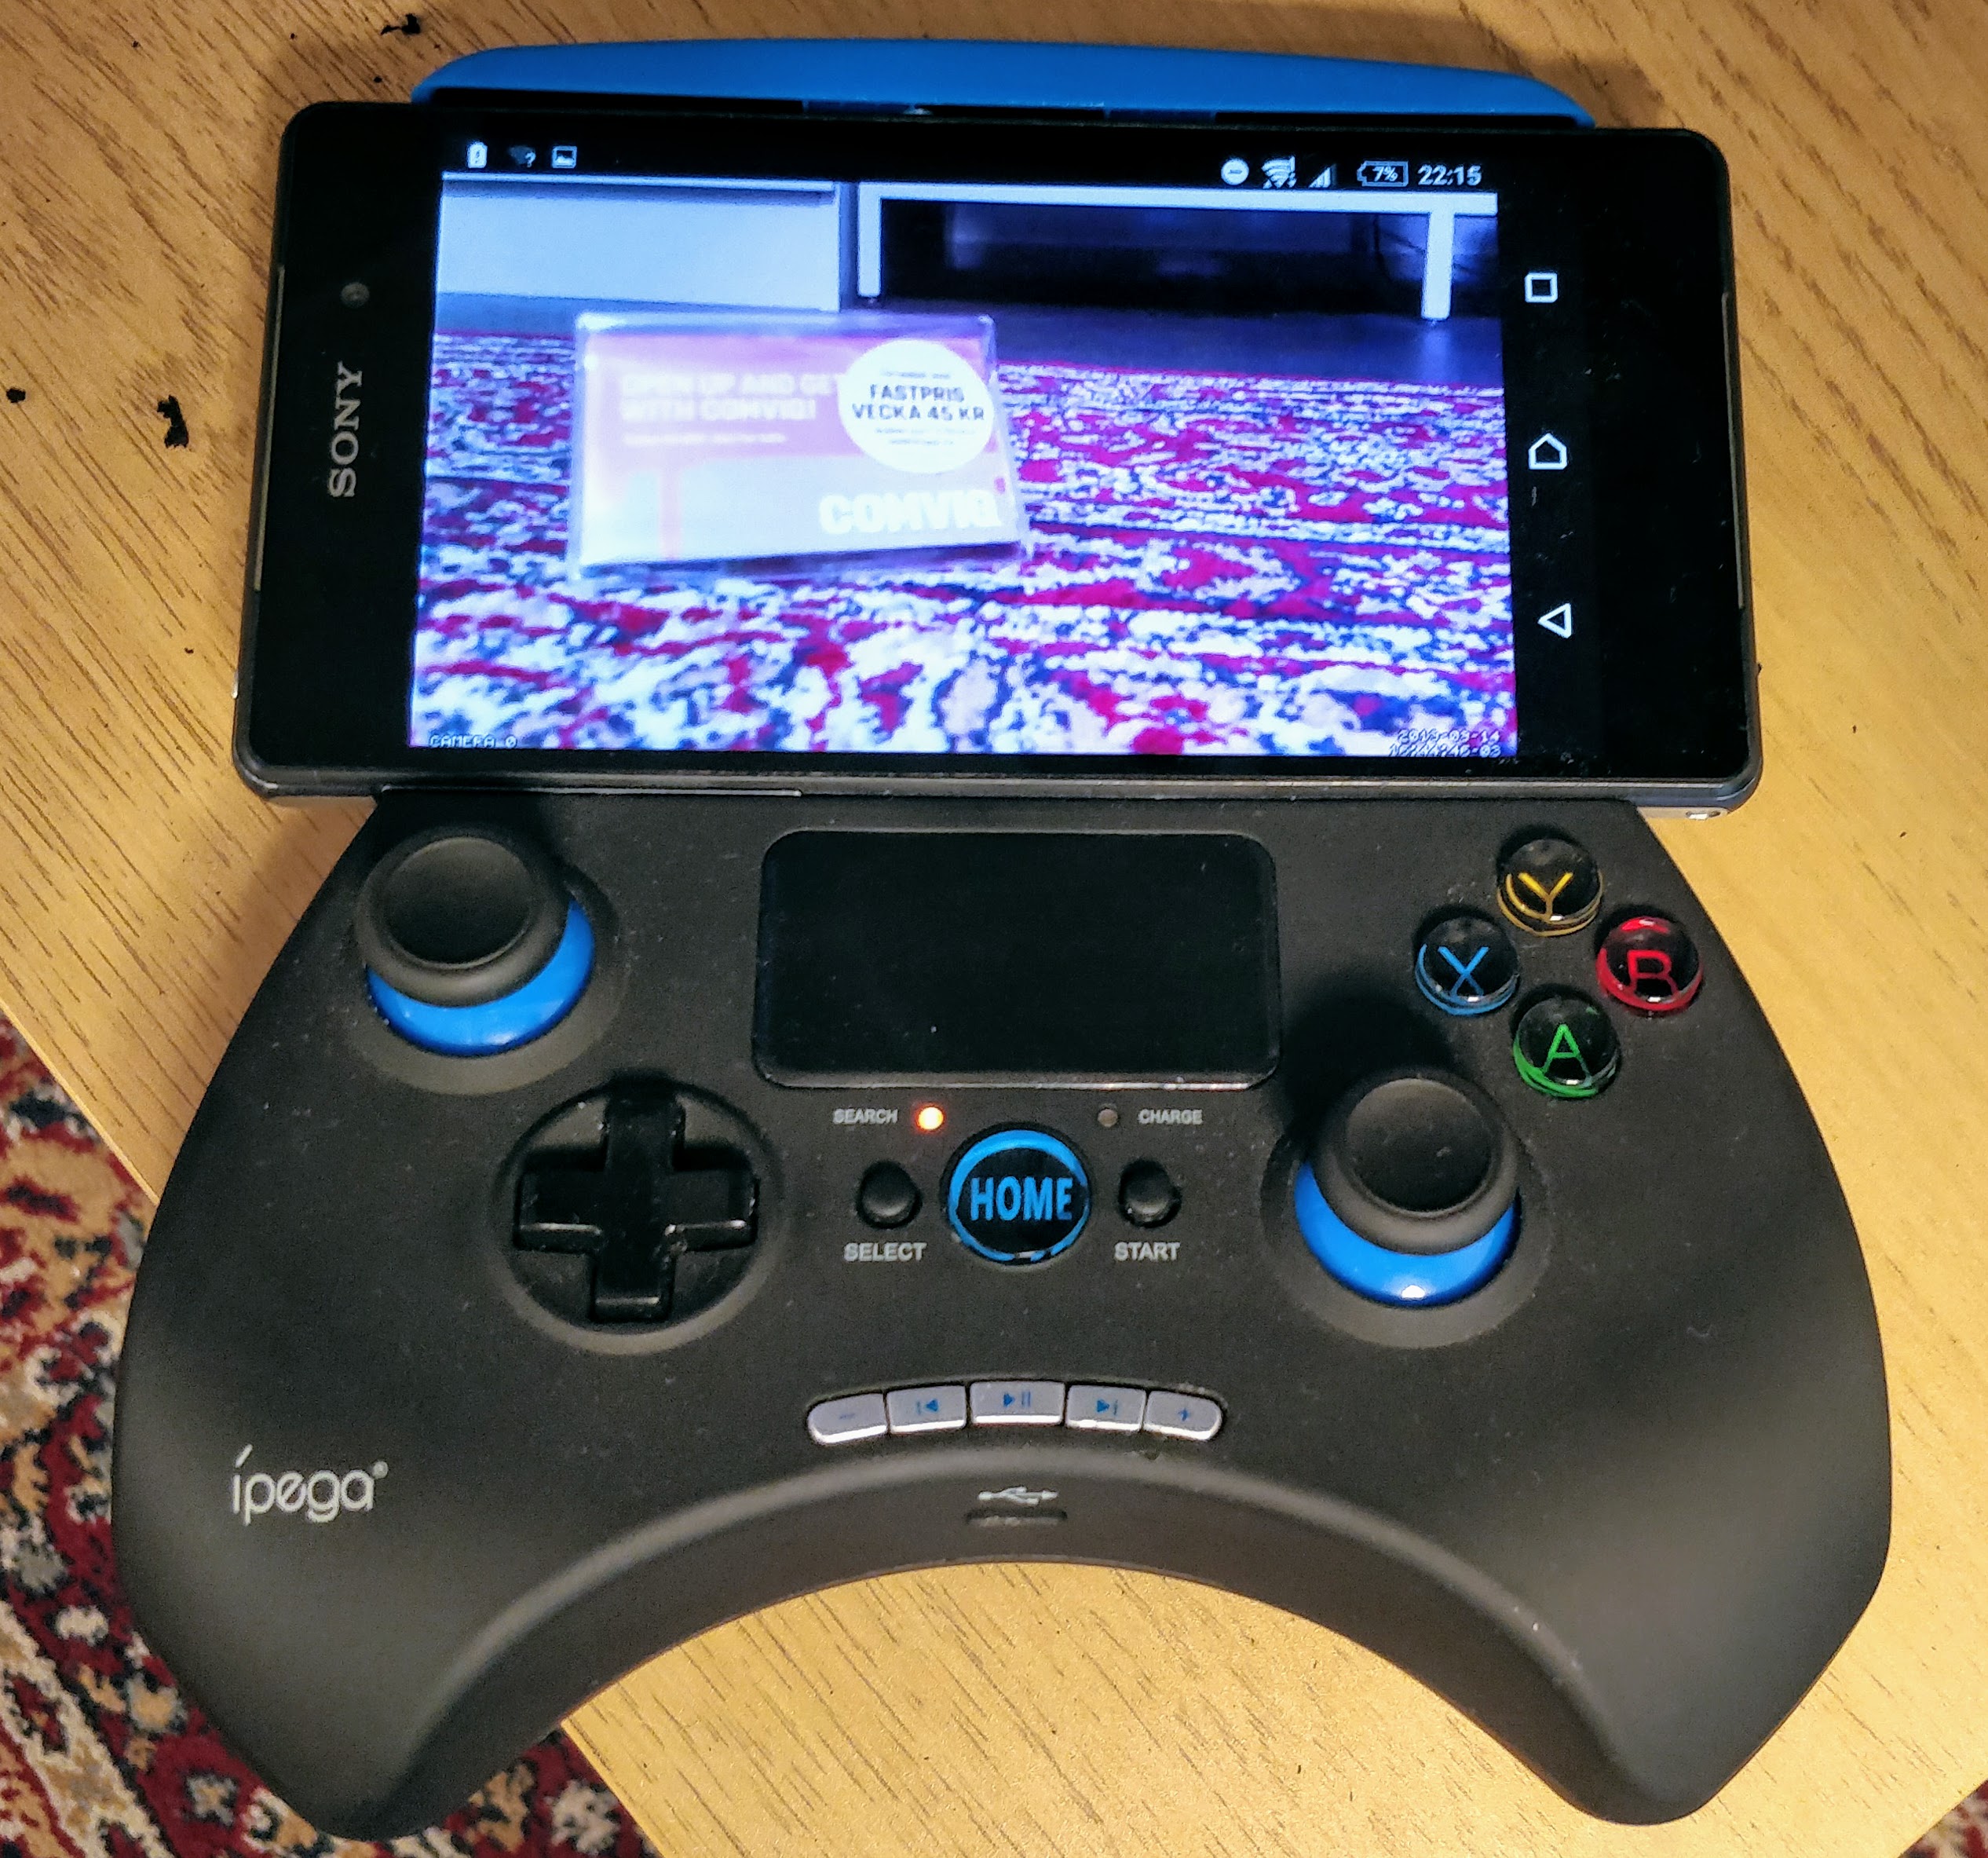
The camera is an ordinary USB web camera that is 4+ years old but i thought it might do the trick. I decided to set up an IP-camera on the raspberry pi:s network which was very simple. The major disadvantage with this camera is the HORRIBLE update-rate or FPS.
The bluetooth controller that i had had a handy holder for a smartphone so when you connected to the raspberry pi:s wireless network you could navigate to the camera feed on the phone.
The Result and Improvements
The end result made it possible to drive the car by only using the camera feed as visual feedback for the driver. However, the poor update rate of the camera does make quick maneuvering tricky but if you take it slow you wont have a problem.
There are A LOT of thing you can do to improve this project. I am however quite happy with the end result and i might revisit this project in the future.
Some of the improvements i have come up with are the following:
- GSM/3G connected for over the internet control.
- Would require a dynamic DNS over 3G
- Latency might become a bigger factor
- AI controlled
- Determine a route to follow using GPS
- Local navigation using Camera data and decision making
- Buy a better car
- The car was kinda crap and the main battery that powered the motors have a tiny capacity and hinders longer trips.
Images and demo


Really? You read the whole thing? Thank you so much for taking the time to read this! If you got any cool improvements or other ideas you can leave them in the comments, i would love to hear them.
Douglas Halse signing off
Hej Douglas 😀